Digital Out
Code blocks used in this tutorial:
Digital Signals
In electronics, there are two types of signals: digital and analog.
A digital signal only has two states: on or off.

on/off are also known as true/false and 1/0?
An analog signal can have multiple states within a range (from 0 to 1023).

In this tutorial, we are going to learn how to control digital signals.
Electronics
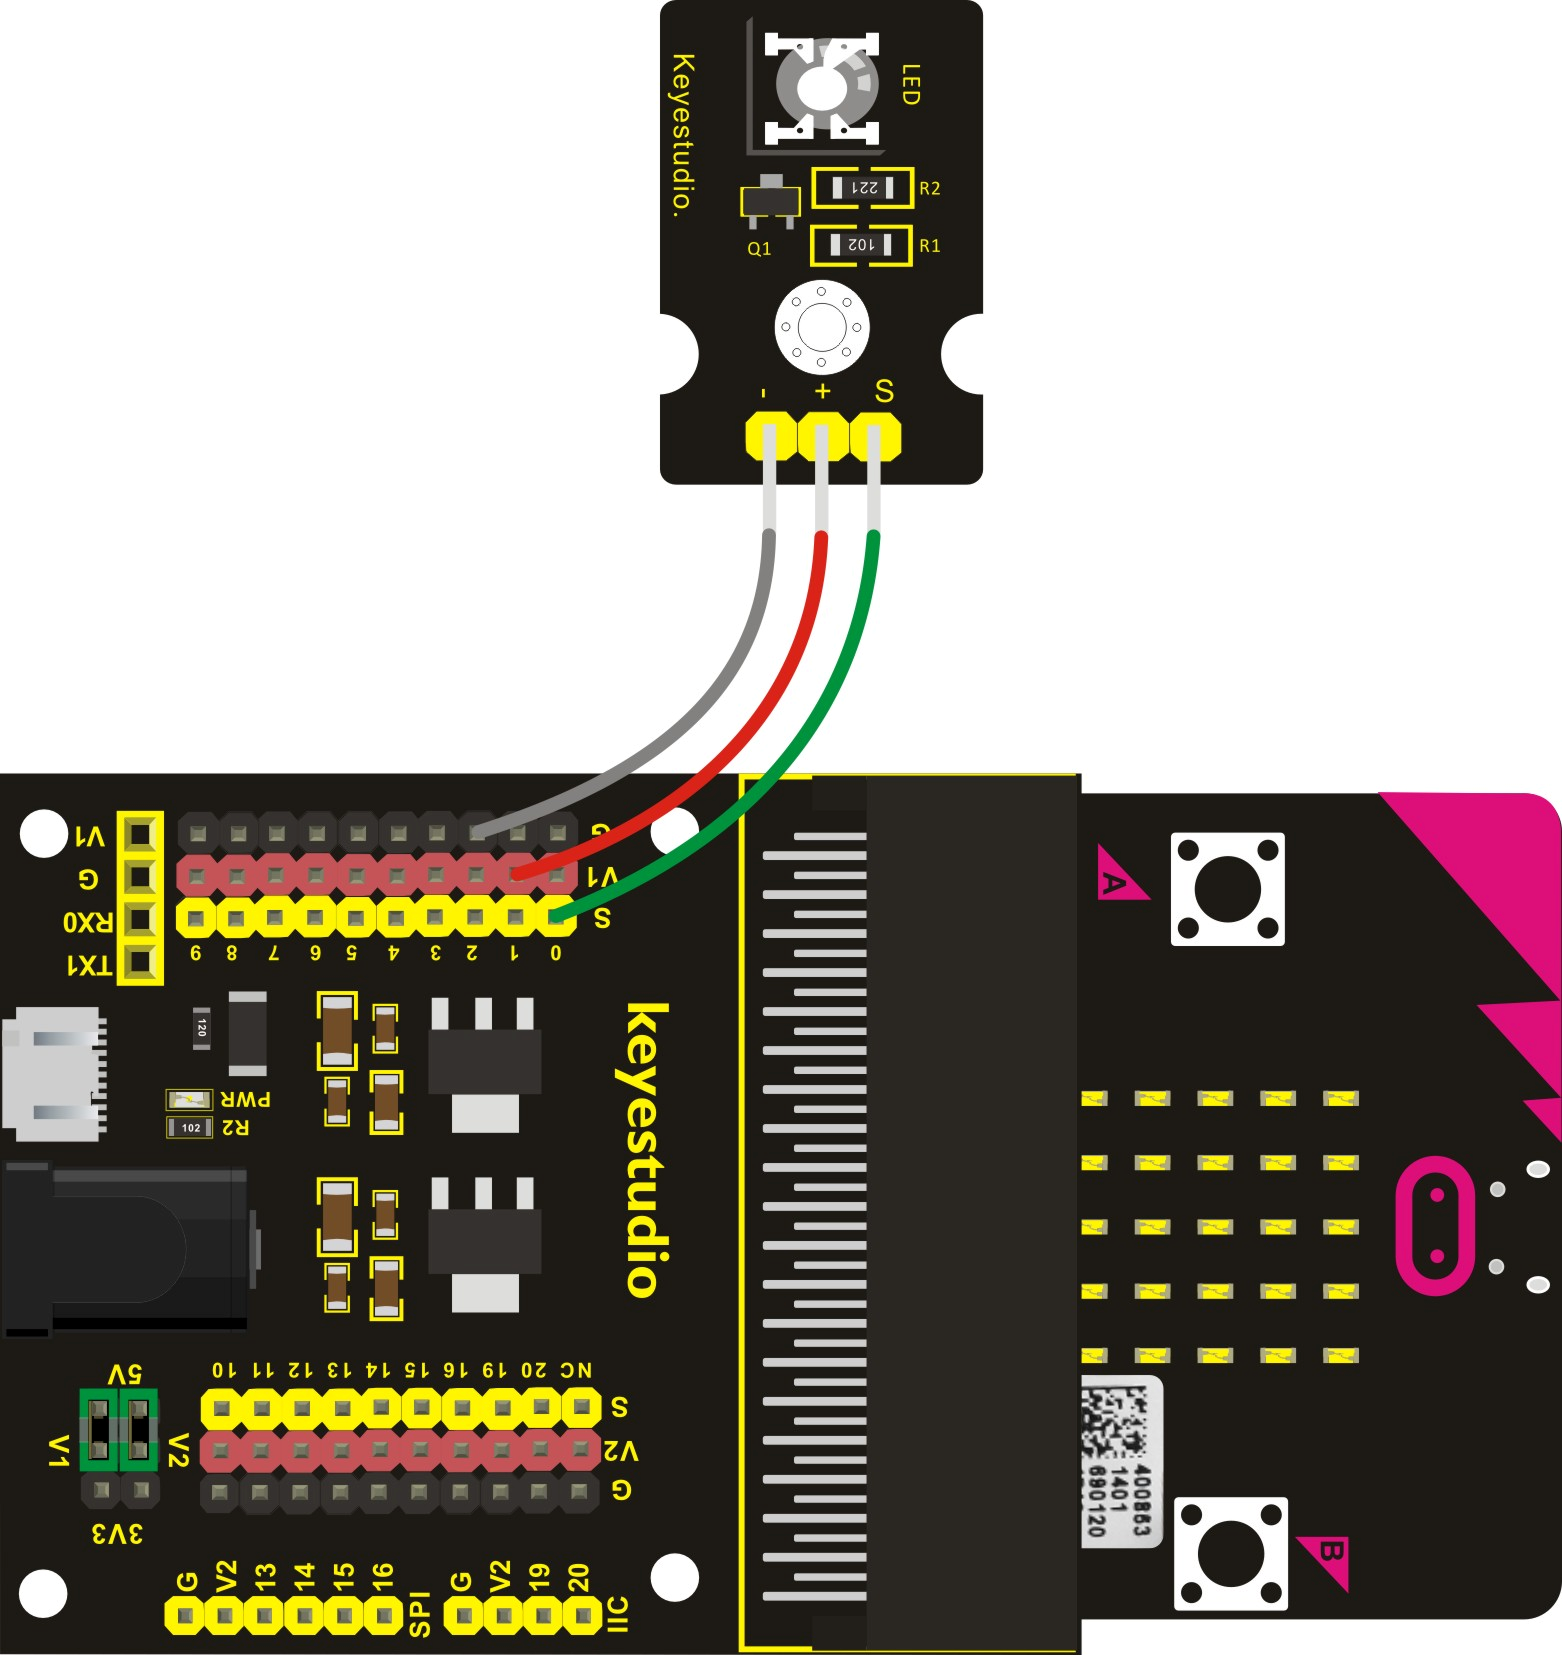
For this tutorial, we are going to use the expansion pack, the LED module and 3 cables.
Let’s do the following steps:
- Grab 1 cable and connect the
Spin of theLED moduleto theS0pin of theexpansion pack. Make sure that the cable is connected to theS0position. - Next, grab another cable and connect the
+pin of theLED moduleto theV1pin of theexpansion pack. This can be connected on any pin as long as it is a red pin ofV1. - Finally, grab the last cable and connect the
-pin of theLED moduleto theGpin of theexpansion pack. This can be connected on any pin as long as it is a black pin ofG.
You should have something like the picture below:
Software
Start a New Project and let’s call it “DigitalOut”.
To control digital signals, we are going to use the code block digital write pin [P0▼] to (0) from the Advanced > Pins blocks.
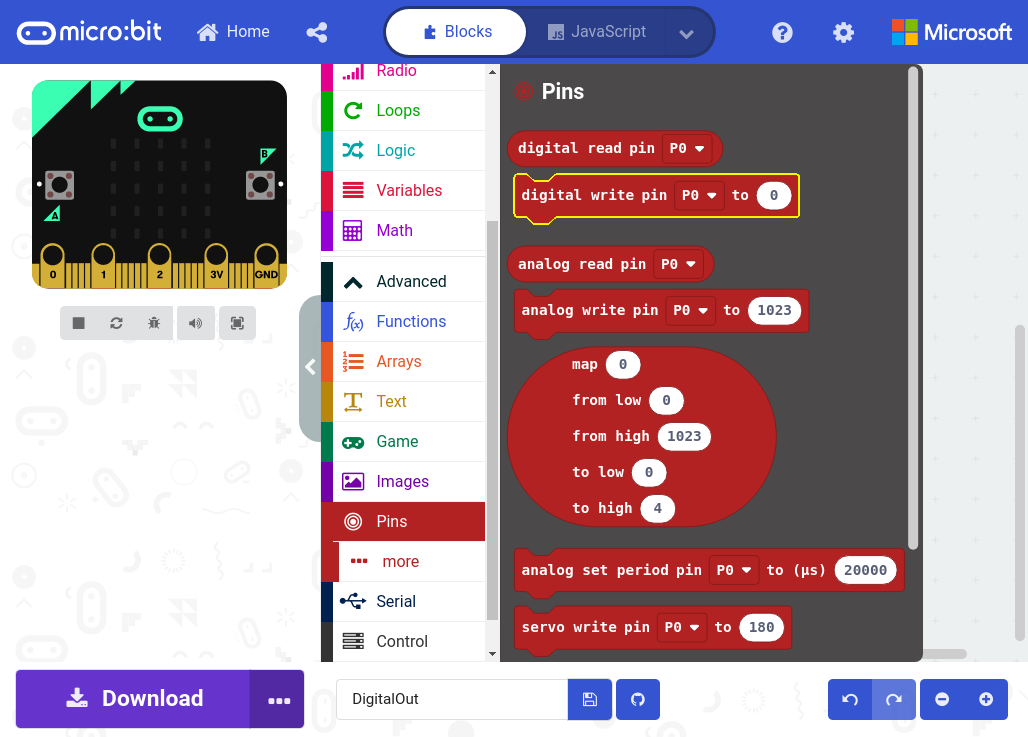
digital write pin Code Block
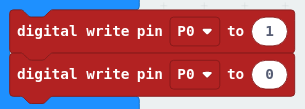
To turn on the LED, we need to send an on digital signal. Likewise, to
turn off the LED, we need to send an off digital signal. In MakeCode,
on = 1 and off = 0.
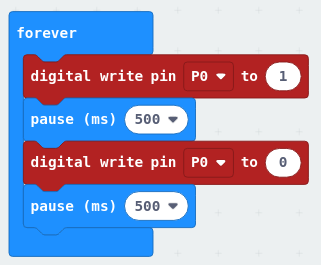
Let’s make a simple blinking LED animation with a 500ms pause between states.
You should have something like this inside the forever block:
The simulation should show something like this. Notice how pin 0 changes
color. That means voltage is flowing through the pin.
Now, upload the code and see it in action!
Are you up for a challenge?
Try to make a program that turns on the LED when you press button A and
turns off the LED when you press button B.
Once you finish, you can check your solution with the answer here.